Within HRWize you can create Timesheet Templates these can be used to setup specific ways for your Employees to complete their submission of a Timesheet and can be assigned to employees within different sites, companies and headcount classifications. This article will show you how to create a Timesheet Template, assign the template to each of these options and what an employee will see when submitting a monthly timesheet.
Adding a timesheet template
To create a timesheet template navigate to:
Admin - Company - Settings - Timesheets - Timesheet Templates
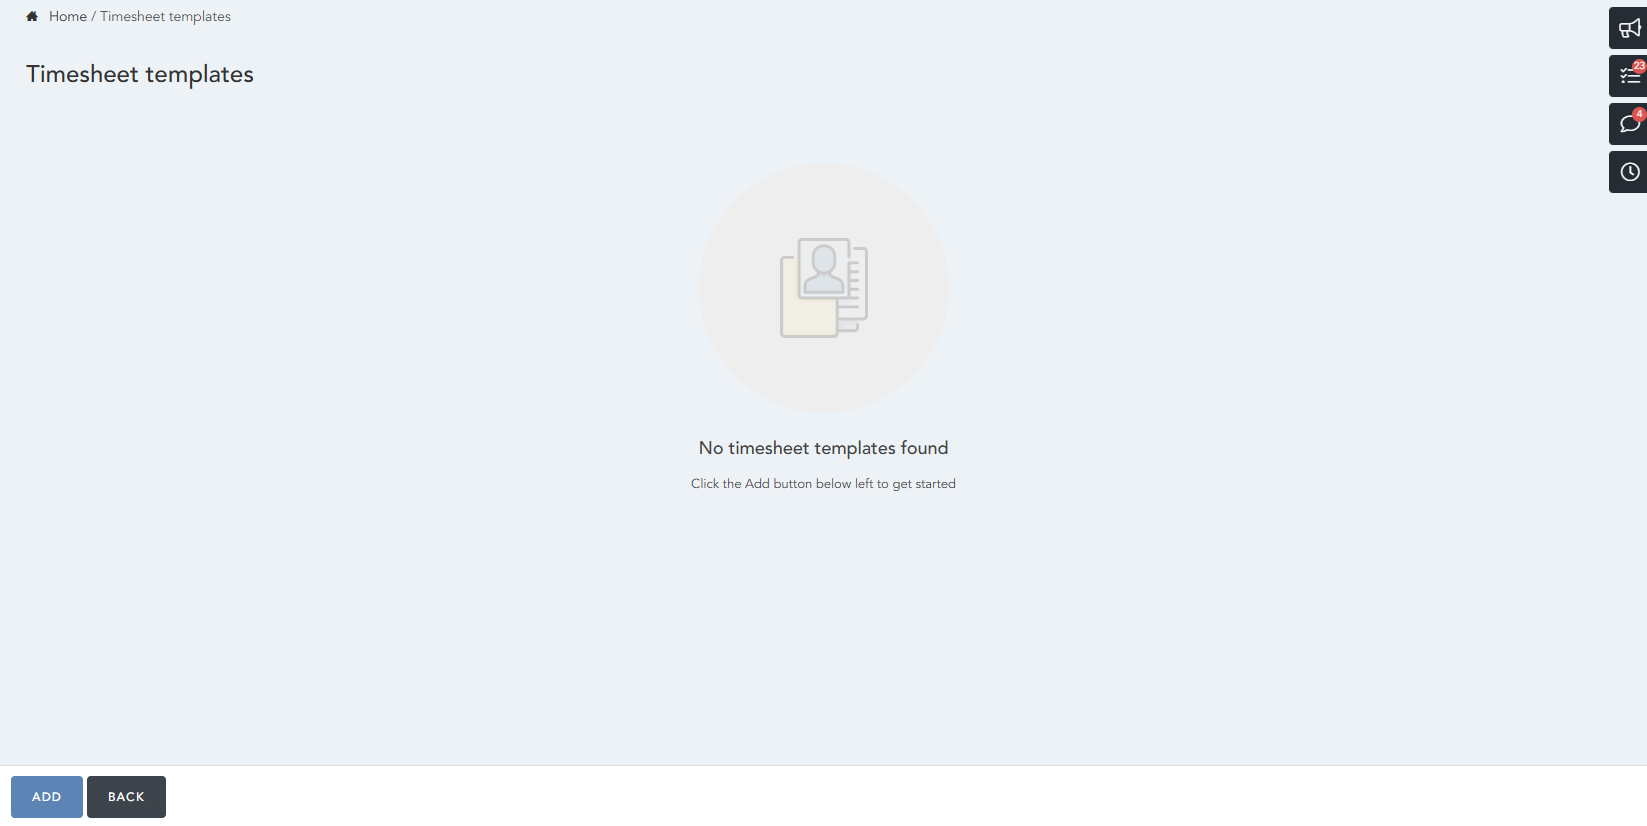
From this screen you can select Add to create a new timesheet template or using the Actions - Edit option, edit an existing timesheet template:
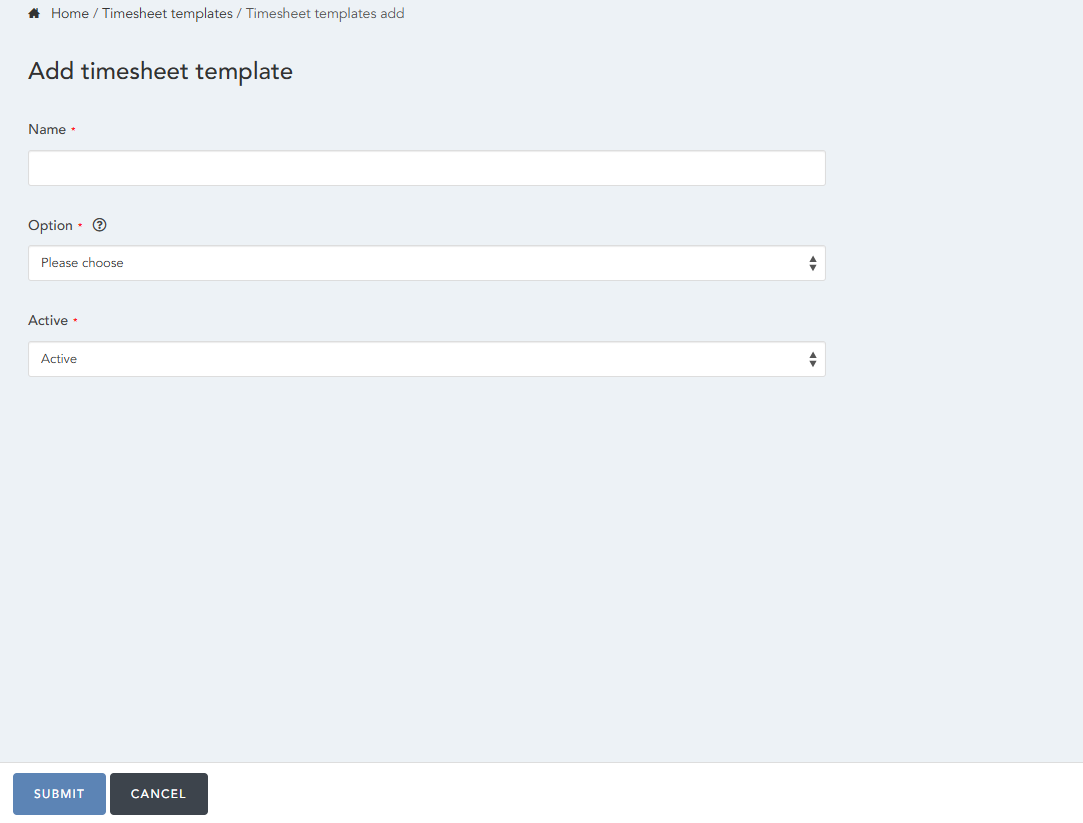
When creating or editing the settings within the Timesheet Template you will see the following settings:
- Name - Here you will enter a unique name for the Template, this will be visible to the employee when selecting the timesheet template from the dropdown.
-
Option - Select from:
-
Day of week - With this selected you will need to then complete the setting:
- Day of week - Select the day of week that the timesheet will start from. This is will allow you to have a weekly timesheet method within the system.
-
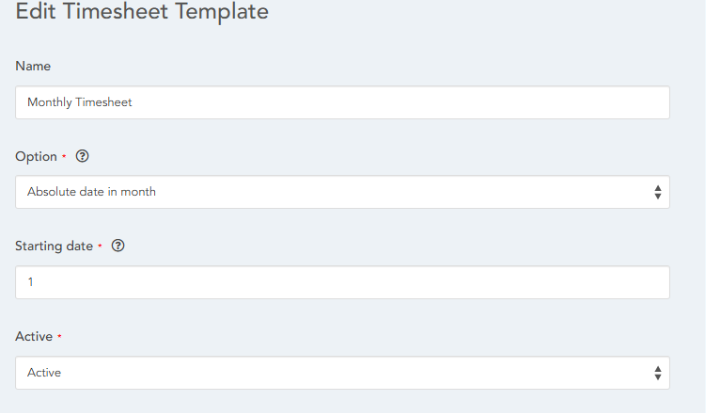
Absolute date in month - With this selected you will need to then complete the setting:
- Starting date - Enter a value to mirror the date that the template will start from. This will then result in a monthly timesheet. For example:
1 = 1st of each Month
15 = 15th of each Month
- Starting date - Enter a value to mirror the date that the template will start from. This will then result in a monthly timesheet. For example:
-
Day of week - With this selected you will need to then complete the setting:
- Active - Choose to have the Template as Active or Inactive.
Select Submit to save any changes or create the new timesheet template.
Assigning a Timesheet template to a Site, Company or Headcount Classification
To assign a timesheet template to a site, company or headcount classification. Navigate into the relevant data management section of the system:
Admin - HR - Data Management - Sites
Admin - HR - Data Management - Companies
Admin - HR - Data Management - Headcount Classifications
Once in the screen, locate the Site, Company or Headcount you wish to modify to include the timesheet template. Select Actions - Edit to open the edit screen:
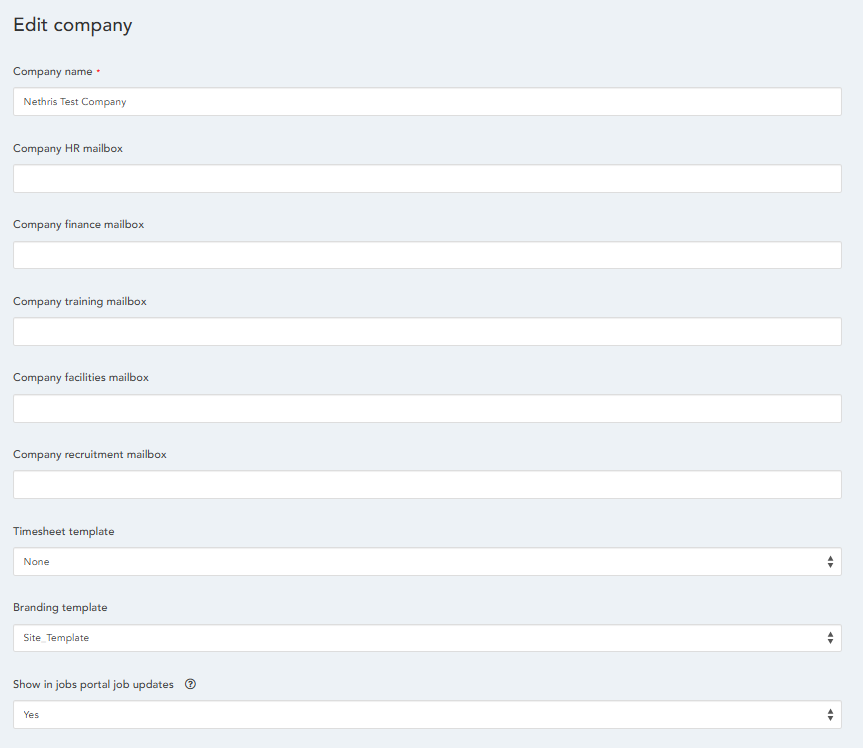
Within the settings for the Site, Company or Headcount you will see a setting called "Timesheet template" set this to the timesheet template that you want to assign to the employees at the Site, Company or with that specific Headcount classification.
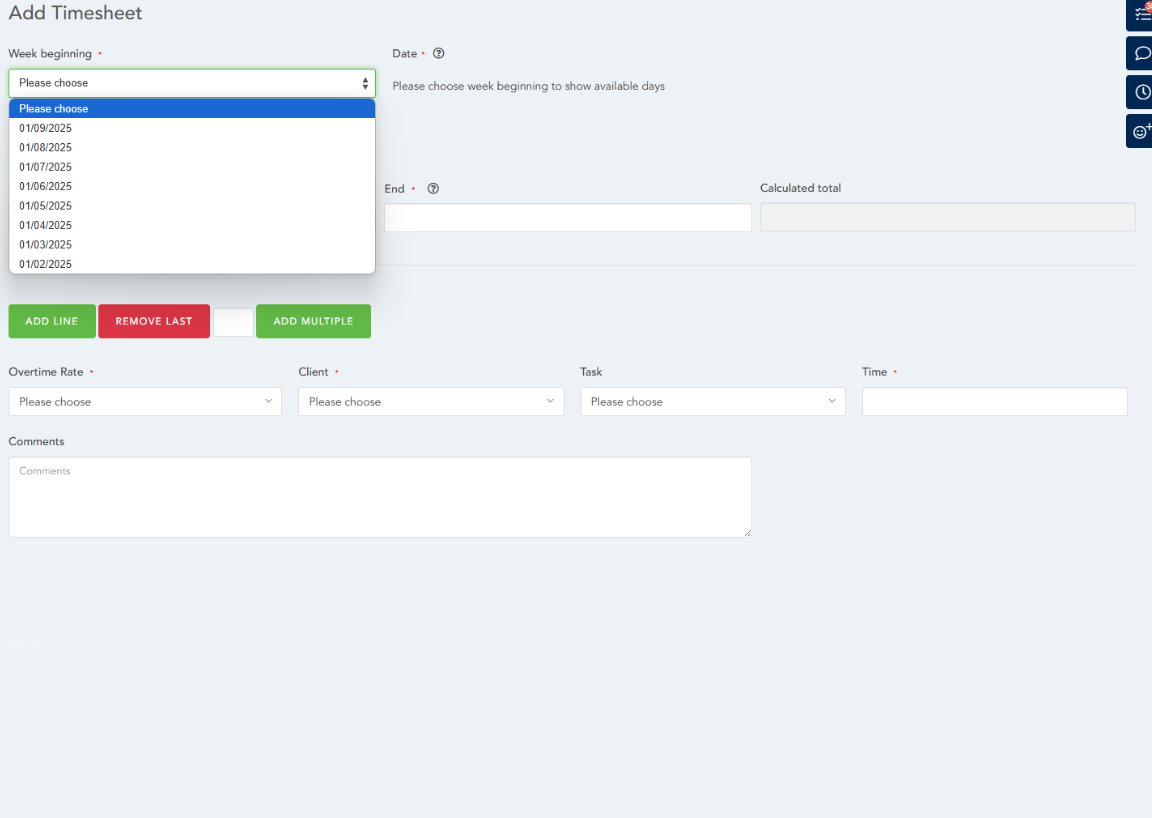
Submitting a Timesheet with a Monthly Timesheet Template assigned:
When a monthly timesheet template has been assigned to a Site, Company or Headcount when submitting a timesheet the employees will only get the option as set in the timesheet template. For example the below employees template is set to absolute date 1st of every month:
Therefore when the Employee navigates to:
Self Service - My Requests - My Timesheets
Selects Add to create a timesheet in the Week beginning field they will only see the options for 1st (01) of each month:
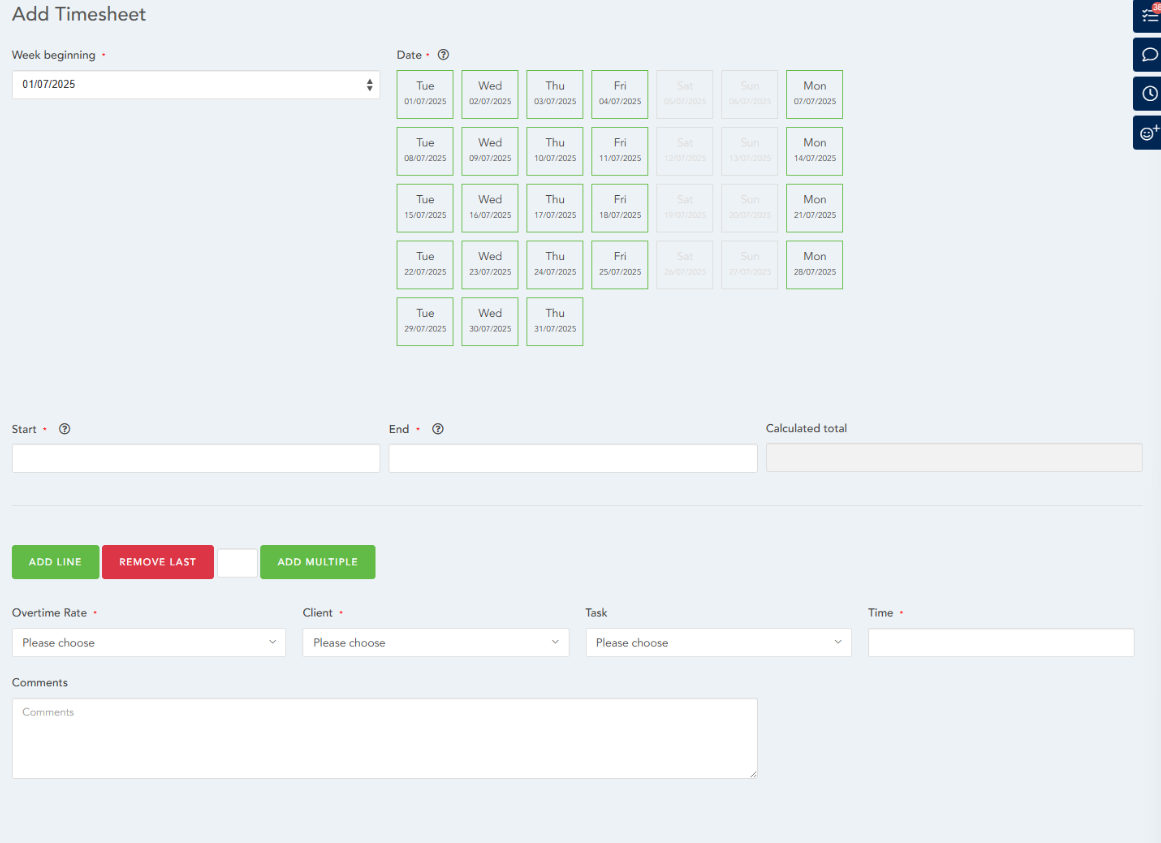
When the employee selects the date they are adding the timesheet for they will then see all available dates in the Date field for the employee to select to add their daily entry:
HRWize
Comments