Within HRWize, the timesheets module allows users to complete and submit timesheets based on hours that they have worked.
To enable Timesheets, go to:
Administration > Company > Settings > Display settings
Select 'Timesheets' from the Module Display section. There is also an option for 'Timesheets (simple)' - this is the original HRWize timesheet solution, however, it has limited functionality and will not work with workflows.

Once the Timesheets module has been enabled, go to:
Administration > Company > Settings > Timesheets > Timesheets settings
General Settings
- Timesheets midnight rollover - For employees who work overnight shifts, setting this to 'Yes' will allow the system to recognize that the start and end times are correct;
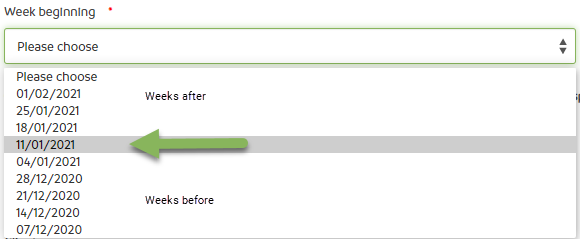
- Timesheets selectable weeks - The number of weeks before and after the current week that the employee will be allowed to enter timesheets for;
-
Timesheets week beginning - By default, timesheets start on a Monday. If you set this to 'Custom', this will instead use the 'Week beginning' value in time off settings for that employee as the first day of the week.
Please Note - If you set 'Custom' when you already have timesheets, this will mean you have one week where your week beginning will be out of alignment. So you should make sure you do not do this whilst anyone has unsubmitted timesheets or it could result In timesheet entries being allocated against the wrong week.
- Timesheets confirmation text - This is what will appear for the employee once their timesheets are submitted.
-
Allow multiple timesheets for each week - Select 'Yes' to enable the creation of multiple timesheets for each week. The employee will see the second row of days indicating that a timesheet entry has already been made for that day.
- Timesheet overtime auto accrue time off in lieu - This is when there is any overtime added when using timesheets, this will create a TOIL value.


Date Selection Settings
- Timesheets- allow employees to choose non working days - Select 'Yes' if you want to allow your employees to enter timesheets on days where they are not scheduled to be in the office, such as non working days or time off.
Other Settings
- Timesheets - multiple lines per entry - Select 'Yes' to allow multiple lines per daily entry, or 'No' for a single line per daily entry.
- Does not apply to - Available if you select 'Yes' above, you can add one or more departments here that multiple lines per daily entry will not be applied to.
- Timesheets - multiple lines per entry total calculation - Available if "Timesheets - multiple lines per entry" above is set to 'Yes', you can select 'Lines' or 'Start/End'. By default, the calculated total in the timesheet is made up of the total of all the line entries. If you prefer this can be calculated instead based on the start, end, and breaks (if applicable).
- Timesheets - multiple lines per entry ignore breaks - Available if "Timesheets - multiple lines per entry" above is set to 'Yes'. By default, when an employee enters their start and end time, the calculation assumes they do not get paid for the time entered into breaks. If you change this to 'Yes', the employee will also get paid for break times as that value will be ignored in the calculation.
- Timesheets - display instructions - Any text entered here will be displayed to the employee when they enter a timesheet.
Timesheets - show billable - If you choose 'Yes', employees will be given the option of choosing billable against each timesheet line entry.
- Timesheets, expenses and mileage - allow pushback -If you choose 'Yes', approvers will be able to push an already approved timesheet, mileage, or expense claim to an employee by changing the status back to draft, allowing the employee to edit and update the original report, after which they can resubmit and go via the approval process again.
- Timesheets total time entry only - If you choose 'Yes', the employee will not be asked to enter a start and end time but instead will be asked to enter a total time in minutes per day.
- Timesheets employee bulk upload - If you choose 'Yes', employees will be able to bulk upload timesheets rather than manually add them via the webform. This will bypass some timesheet validation such as allowed hours and so on. A "Bulk upload" button will appear if the option is set to 'Yes'. The employee will see a screen like this which provides guidance on how to bulk upload the timesheet data.
- Timesheets bulk approve - If you choose 'Yes', managers/approvers will be able to bulk approve timesheets from the listing page. This means it is possible for them to approve timesheets without ever actually viewing them.
- Departments not requiring approval - Any department which is selected ticked will not require approval for timesheets submitted via self service - use with caution especially if you use timesheets to calculate payroll and so on.

Timesheet references and tasks
- Timesheets references - Click here to read an article about how to create and use References and Task in Timesheets, Expenses, Mileage and Time tracking.
Time Settings
- Timesheets allowed hours - If you wish to only allow timesheets to be entered for certain hours, set these here - If you choose none then all 24 hours will be available.
If the employee enters times outside these hours, they will see a warning like this.

You can set the following which will be the default settings on all timesheets.
- Default start time
- Default end time
- Default break

Time tracking Settings
- Time tracking use timesheets references - If you want to require your employees to enter a reference (using the same references and optionally tasks and billable when entering time tracking entries, then choose 'Yes'.
HRWize
Comments